
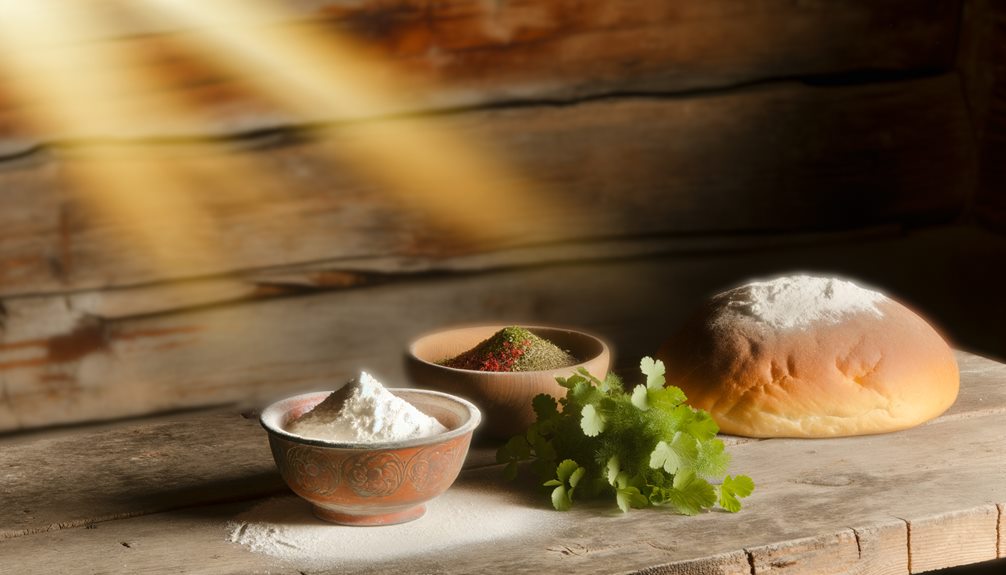
Are you ready to elevate your baking game with an easy and delicious bread recipe? Imagine a warm, cheesy loaf fresh from the oven, filling your home with irresistible aromas that beckon your family and friends to the kitchen.
Baking bread with self-raising flour is not just simple; it's a delightful experience that anyone can master!
Picture this: in just a few minutes, you can whip up a delightful batter using 2 cups of self-raising flour and 1 cup of milk, mixing until perfectly smooth.
But wait, there's more! To take your loaf from ordinary to extraordinary, fold in a cup of grated cheese and some fragrant chopped chives.
Now, pour that luscious batter into a greased loaf pan and slide it into a preheated oven at 400°F. In about 30 minutes, you'll have a golden-brown masterpiece that not only looks fantastic but smells heavenly.
Your kitchen will become the heart of your home, filled with the warmth of freshly baked bread.
Don't miss out on this game-changing recipe! Stick around, and I'll share even more tasty variations that will keep your baking adventures exciting and your taste buds thrilled.
Let's get started on your journey to becoming a bread-baking pro!
Ancient Bread-Making Techniques
Let's take a moment to appreciate the ancient art of bread-making, where traditional ingredients brought flavor and texture to loaves long before self-raising flour hit the shelves.
You'll find that fermentation and rising methods varied widely, giving each culture its unique twist on this beloved staple.
Traditional Ingredients Used
In ancient bread-making techniques, the choice of traditional ingredients played a crucial role in creating flavorful loaves. You'd be amazed at how the right mix of traditional flours can transform your baking. Think about whole wheat, rye, or spelt—each flour has a unique character that adds depth to your bread.
These ingredients not only reflect baking history but also connect you to the generations that came before us. When you use these traditional flours, you're tapping into the essence of what bread has meant for cultures throughout time.
The texture, aroma, and taste of your loaves can evoke a sense of nostalgia while inspiring creativity. Imagine the satisfaction of crafting a loaf that honors ancient methods while still feeling fresh and innovative.
And let's not forget the role of water and salt! These simple ingredients enhance flavor and texture, proving that sometimes, less is more.
So, as you gather your ingredients, consider how each one contributes to the overall experience. Embrace the legacy of bread-making, and you'll find yourself not just baking, but also savoring a delicious piece of history.
Happy baking!
Fermentation and Rising Methods
Understanding traditional ingredients sets the stage for exploring fermentation and rising methods in ancient bread-making techniques.
When it comes to bread, the magic often lies in how you let your dough come to life. You begin with yeast activation, which is essential. You'll want to mix your yeast with warm water and a touch of sugar to awaken those little warriors. They'll start bubbling, ready to transform your dough.
Next, focus on dough hydration. This isn't just about adding water; it's about finding that sweet spot. The right hydration level influences the texture and flavor of your bread. Too little, and you'll end up with a dense loaf; too much, and you'll have a sticky mess.
Once you've got your yeast bubbling and your dough hydrated just right, it's time to knead. This helps develop gluten, giving your bread structure.
After kneading, let it rise in a warm spot until it doubles in size. This process not only enhances flavor but also creates those delightful air pockets we all love.
Cultural Variations in Bread
Across cultures, bread takes on unique forms and flavors, reflecting the diverse traditions and ingredients of each region. When you immerse yourself in the world of regional bread, you'll discover how historical influences shape what's on our tables.
For instance, think about how sourdough in San Francisco or pita in the Middle East carries cultural significance beyond just taste.
Bread often symbolizes community, binding people together through shared rituals. In many cultures, festive breads mark special occasions, like challah for Shabbat or panettone during Christmas.
These aren't just delicious treats; they represent community traditions and the art of ritualistic baking.
During bread festivals, local bakers showcase their artisan techniques, often using regional ingredients that tell a story of their land.
Imagine the aroma of freshly baked loaves, each piece a reflection of the love and effort put into it.
Essential Baking Components
While you might think baking is all about following recipes, the essential components play a crucial role in achieving the perfect loaf. Understanding the baking science behind your ingredients and their ratios can elevate your bread-making game to new heights. Let's explore those key components.
- Flour: This is your foundation. Choosing the right type—like self-raising flour—affects texture and rise.
- Liquid: Water, milk, or even yogurt can transform your dough. The right amount hydrates the flour, activating gluten, which gives your bread structure.
- Leavening Agents: In self-raising flour, these agents are already included. They help your bread rise, creating that airy texture you love.
- Salt: Don't skip this! Salt enhances flavor and strengthens gluten. It's a small ingredient, but it packs a punch.
When you get the ingredient ratios right, you're not just following a recipe; you're engaging with the science of baking.
So, experiment with these essential components, and soon enough, you'll be crafting loaves that not only taste amazing but also reflect your innovative spirit.
Happy baking!
Beloved Baking Favorites
When it comes to baking, there are a few recipes that really steal the show, and self-raising flour is your best friend in this lineup.
Imagine whipping up a quick self-raising flour bread that's perfect for any meal, or a herb-infused version that'll make your kitchen smell heavenly.
And let's not forget about the cheddar and chive bread, which is so cheesy and delicious that you might just want to eat it all in one sitting!
Quick Self-Raising Flour Bread
If you're looking for a quick and delicious bread option, self-raising flour is your best friend. It simplifies the baking process, allowing you to whip up a loaf in no time. You'll love the self-raising benefits, like reduced prep time and fluffy, tender texture.
Here's how to get started with your quick baking adventure:
- Gather Ingredients: You'll need self-raising flour, water (or milk), salt, and a dash of oil.
- Mix the Dough: Combine the dry ingredients first, then gradually add the liquid until a soft dough forms. Don't overmix!
- Shape and Bake: Shape the dough into a loaf or rolls. Place them on a baking tray and pop them in the oven at 400°F (200°C) for about 25 minutes.
- Enjoy: Let it cool for a few minutes, then slice and serve warm, slathered with butter or your favorite spread.
With this quick self-raising flour bread, you'll impress your friends and family in no time.
Herb-Infused Self-Raising Bread
Elevate your baking game with herb-infused self-raising bread, a delightful twist on the quick bread you just learned about. This innovative recipe introduces a world of flavor profiles that'll make your taste buds dance.
Mixing herbs into your dough not only enhances taste but also adds a beautiful aroma that fills your kitchen with warmth and comfort.
To get started, consider these herb combinations that work wonders:
- Rosemary and Thyme: Classic flavors that bring a Mediterranean touch.
- Basil and Oregano: Perfect for a pizza-inspired bread experience.
- Chives and Dill: A fresh, vibrant option that's great for brunch.
- Sage and Parsley: Earthy undertones that elevate your everyday loaf.
Simply mix your chosen herbs into the self-raising flour before incorporating the wet ingredients. The key is to let the flavors meld, creating a bread that's both fluffy and fragrant.
Whether you're enjoying it warm with a pat of butter or pairing it with your favorite soup, this herb-infused delight is sure to impress.
Cheddar and Chive Bread
Cheddar and chive bread is a savory masterpiece that combines the rich, creamy flavor of cheese with the fresh bite of chives. This delightful creation isn't just tasty; it also elevates your baking game.
The sharpness of cheddar pairs beautifully with the mild onion notes of chives, making it a perfect addition to any meal or a snack on its own. Plus, chives offer numerous health benefits, such as boosting your immune system and aiding digestion.
Ready to initiate this delicious journey? Here's what you need:
- Ingredients: Self-raising flour, grated cheddar cheese, chopped chives, and milk.
- Mixing: Combine the dry ingredients, then fold in the cheese and chives.
- Baking: Pour the mixture into a loaf pan and bake until golden brown.
- Serving: Enjoy it warm, perhaps with a dab of butter or your favorite spread.
This cheddar pairing isn't only innovative but also a crowd-pleaser. Whether you're hosting a dinner party or just looking for a cozy snack, this cheddar and chive bread will surely impress!
Baking Temperature Adjustments
When it comes to baking bread with self-raising flour, getting the temperature just right can make all the difference.
You'll want to know the ideal range, especially if you live at a higher altitude, and don't forget to check if your oven's calibration is spot on.
Trust me, a little adjustment can turn a good loaf into a great one!
Optimal Baking Temperature Range
Finding the ideal baking temperature range is essential for achieving the perfect loaf of bread with self-raising flour. You want your bread to rise beautifully while maintaining that light and fluffy texture, right?
So, let's talk about the sweet spot for baking temperature—typically between 375°F and 425°F. This range allows your dough to cook evenly, giving it that gorgeous golden crust.
When you're experimenting, keep an eye on your dough consistency. If it's too wet, you might need a slightly higher temperature to help it set quickly, preventing it from spreading too much. Conversely, a dryer dough might benefit from a lower temperature, allowing it to bake thoroughly without burning.
Always preheat your oven; this guarantees that your bread starts cooking immediately, locking in those delightful flavors. You can even rotate your loaf halfway through baking to promote even cooking.
As you master this temperature range, don't be afraid to innovate—every oven is different! So, pay attention to how your bread reacts, and adjust as necessary. With practice, you'll soon be turning out loaves that impress everyone, including yourself!
Adjusting for Altitude
As you bake at higher altitudes, you might notice that the standard baking temperatures and times need a bit of tweaking. When you're living in a mountainous area, the lower air pressure can cause your bread to rise faster, which might sound great but can lead to some unexpected results. It's all about those altitude adjustments!
You'll want to increase your baking temperature by about 15 to 25 degrees Fahrenheit. This helps guarantee your bread bakes through without collapsing.
Experiment with your baking techniques, too. Sometimes, a shorter baking time is necessary, so keep an eye on your loaf. If you notice it browning too quickly, you may need to tent it with foil.
Don't forget about hydration! You might need to incorporate a bit more liquid into your dough since the air is drier at higher elevations.
Play around with your ingredients and methods, and don't be afraid to take notes. After all, mastering bread baking at altitude is a rewarding challenge!
Embrace the innovation, and soon you'll be crafting the perfect loaf that rises to the occasion, no matter where you are.
Oven Calibration Importance
Accurate oven calibration is essential for achieving consistent baking results, especially if you've made adjustments for altitude. If your oven's temperature isn't spot-on, even the best bread recipe with self-raising flour can fall flat—literally! You might find that your loaves are either undercooked or burnt, and that's just disappointing.
To get the most out of your baking adventures, embrace some oven calibration techniques. Start by using an oven thermometer to check if your oven's temperature matches what you set it to. You might be surprised at the difference!
If you find discrepancies, adjust your settings accordingly. Don't underestimate the baking accuracy importance. A few degrees can mean the difference between a perfect crust and a soggy disappointment.
Also, consider preheating your oven longer than you think necessary. This guarantees that every part of your oven reaches the ideal temperature for baking.
Final Thoughts
Baking bread with self-raising flour offers a simple yet rewarding experience that anyone can enjoy. You don't need to be a seasoned baker to immerse yourself in this delicious world. With just a few ingredients, you can create something truly special.
Plus, the beauty of self-raising flour is that it opens the door to exciting baking experiments. Feel free to play around with recipe variations! Want a hint of sweetness? Toss in some honey or sugar. Craving a savory twist? Try adding herbs or cheese. The possibilities are endless, and your kitchen can become a playground of flavors.
What's great about self-raising flour is its ability to simplify the process. You get that delightful rise without the hassle of yeast. That means more time enjoying the aroma of freshly baked bread and less time worrying about proofing.
Questions And Answers
Can I Substitute Self-Raising Flour With All-Purpose Flour?
You can definitely substitute self-raising flour with all-purpose flour, but you'll miss out on some self-raising benefits.
To mimic that leavening effect, add baking powder—about 1 teaspoon for every cup of all-purpose flour. This simple baking tip keeps your baked goods fluffy and light.
Don't fret if you play around with ratios; innovation is part of the fun in the kitchen!
How Long Does Self-Raising Flour Last Before It Expires?
Imagine opening a treasure chest of baking possibilities!
Self-raising flour can last about six to twelve months when stored properly in a cool, dry place. Its shelf life depends on the packaging and storage conditions.
The self-raising benefits, like convenience and fluffy baked goods, make it a favorite.
Just remember to check for any off smells or clumping; these are signs it might've gone bad.
Happy baking, innovator!
Is Self-Raising Flour Gluten-Free?
You might be surprised to learn that self-raising flour isn't gluten-free. It's made from wheat flour, which contains gluten.
If you're looking for gluten-free alternatives, consider using a combination of gluten-free flours, like almond flour and tapioca starch.
For baking tips, try adding a gluten-free baking powder to mimic the rise of self-raising flour.
Get creative with your recipes, and don't hesitate to experiment—your taste buds will thank you!
Can I Add Yeast to Self-Raising Flour Recipes?
Ever thought about adding yeast to your self-raising flour recipes?
While self-raising flour already contains baking powder, you can certainly add yeast to enhance the dough texture and boost yeast activation.
Just remember, it'll change the rise and flavor profile.
Experiment with a little yeast; it might surprise you!
So, if you're looking to innovate your baking, go ahead and give it a try.
Who knows? You might create something delicious!
What Are the Best Storage Methods for Self-Raising Flour?
To store self-raising flour, keep it in an airtight container in a cool, dry place.
This method preserves its consistency and maximizes the self-raising benefits. You can also refrigerate it if you'd like to extend its shelf life.
Just remember to bring it back to room temperature before using. Proper storage guarantees your flour stays fresh and effective, helping you create amazing baked goods every time.
Who knew flour could be so exciting?
Conclusion
Baking with self-raising flour can be a game changer, making your bread light and fluffy without the fuss. Remember, "a baker's dozen is a baker's best friend," so don't hesitate to experiment with your recipes. Each loaf is a chance to learn and grow in the kitchen. So roll up those sleeves, embrace the mess, and enjoy the process. Happy baking, and may your bread always rise to the occasion!